Getting Started
Getting started with Autoaddress is a simple three-step process.
1. Create an Autoaddress account
Follow this link to navigate to the Account Center sign-up page and enter your details, no credit card required.
https://account.autoaddress.com/signup/
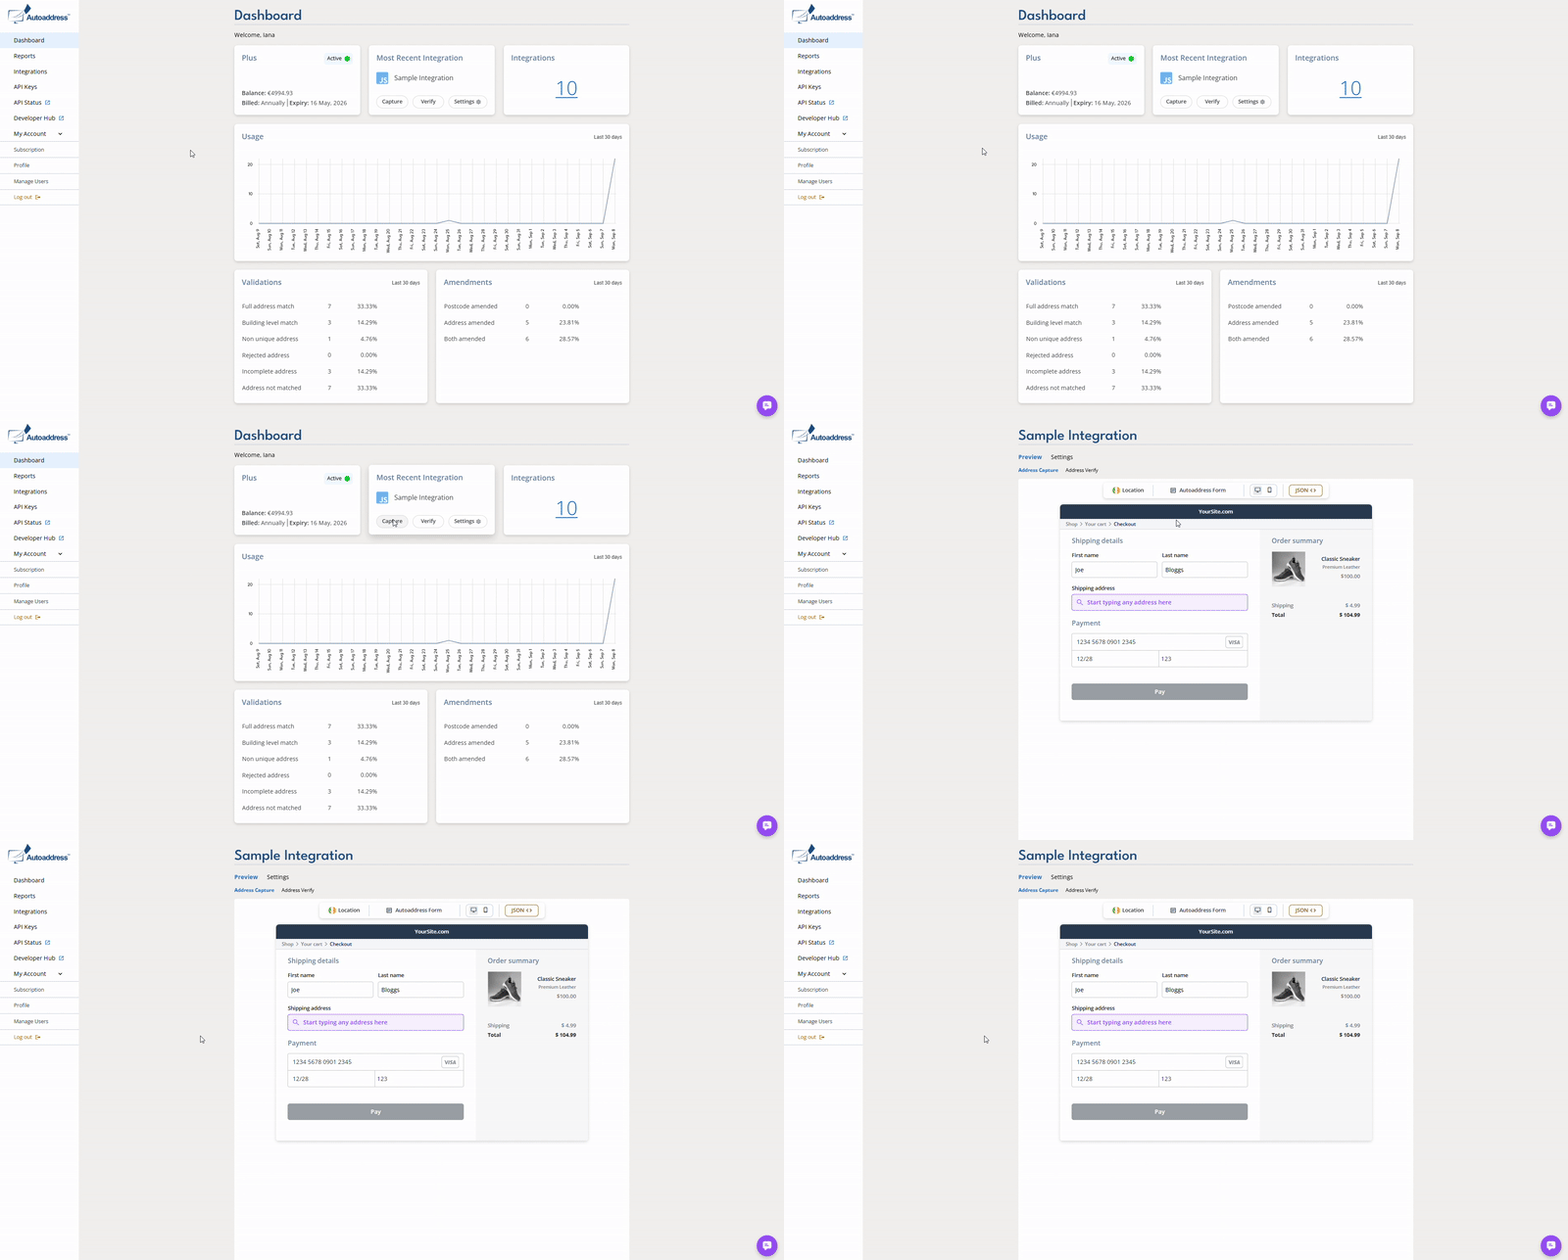
After signing in, you'll be directed to your account Dashboard. This will display an overview of your Account, including your subscription details, integration details and a summary of reports.
Your integration can be used access both our Capture and Verify services.
Capture allows you to quickly capture accurate addresses. It reduces friction and improves data quality with fast, reliable global address autocomplete.
Verify is our address verification API that helps you capture accurate, verified postal addresses from express payments such Apple Pay, Google Pay, Klarna, etc. for Irish and UK addresses.
Are you interested in integrating Autoaddress with your e-Commerce store? We offer seamless support for both Shopify and BigCommerce, allowing for direct integrations that can enhance your online shopping experience.
2. Preview it in Action
To experience the Capture and Verify services, click the "Capture" button under Sample Integration to access your sample integration. This will take you to the Preview page, where you can choose between Address Capture and Address Verify. You can then enter various addresses to test the functionality of both services.
We've pre-selected every country so you can go ahead and type any address to see how it works.
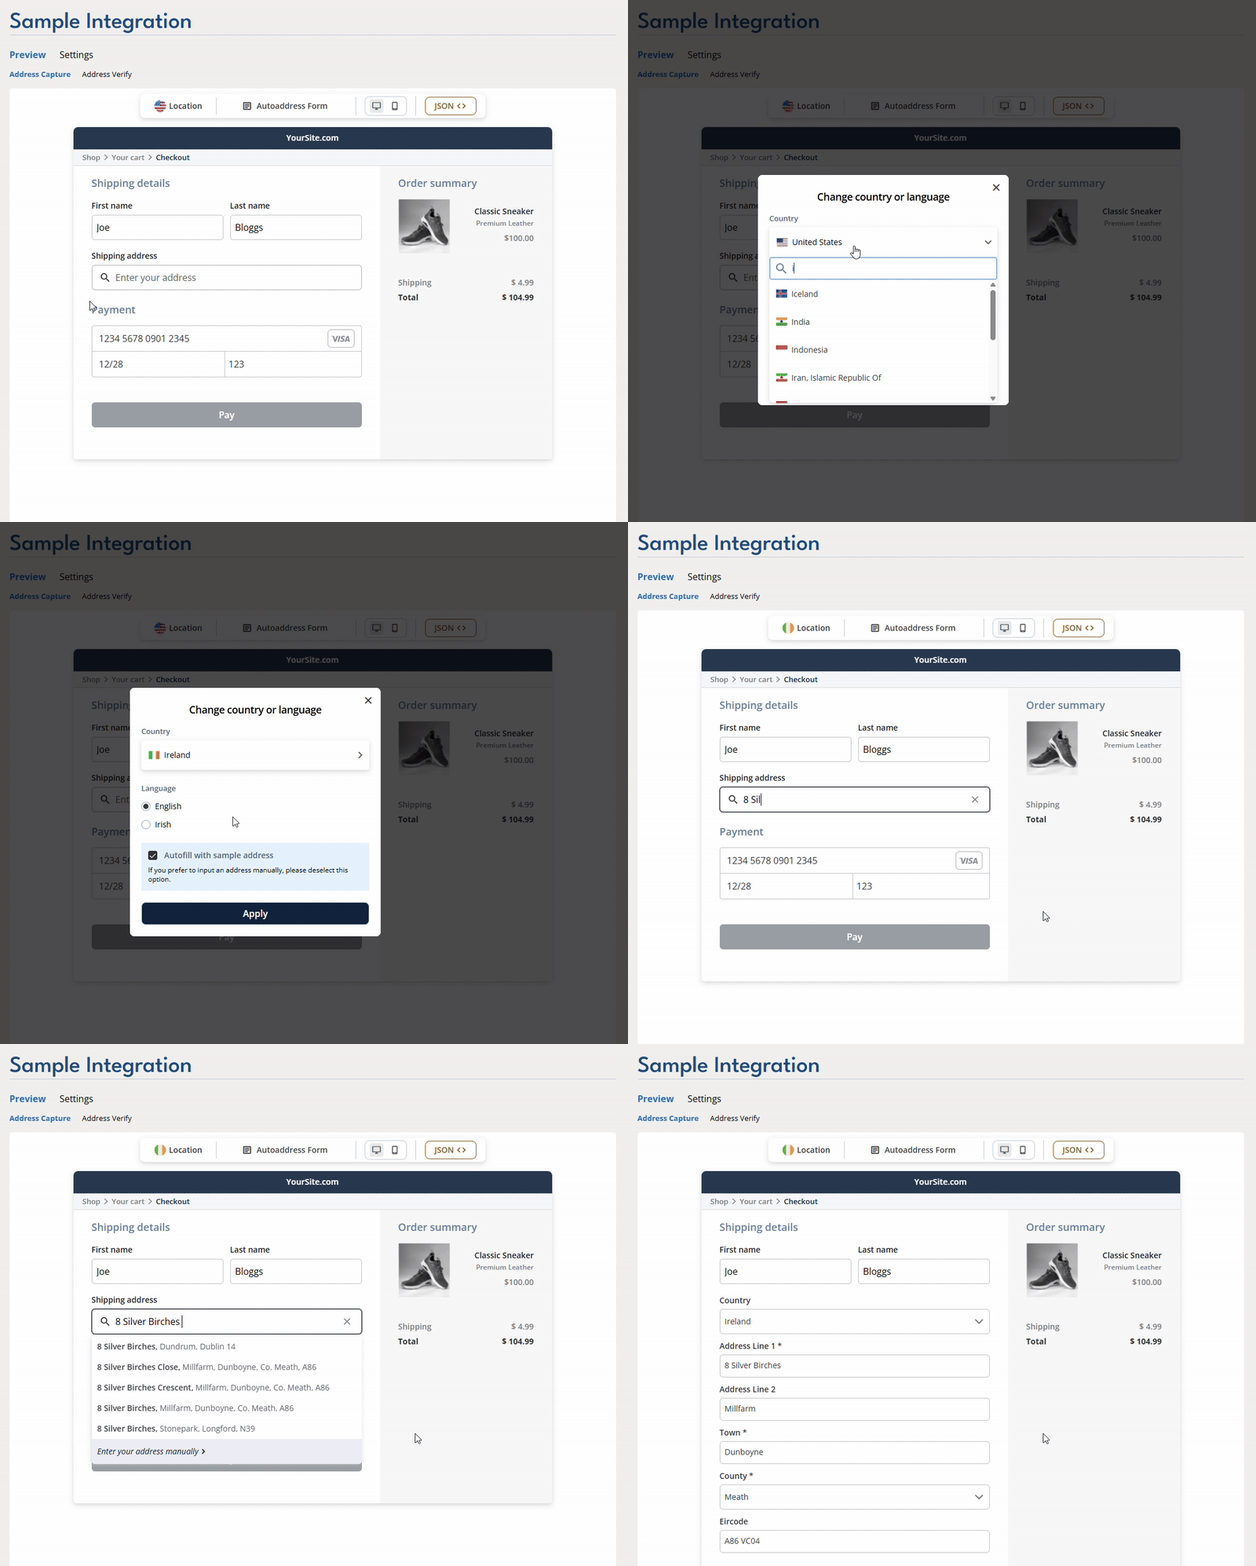
For the address capture, we've included a sample address selector. Simply select "Location", select your desired country from the Country drop down, select a language from that countries supported languages and ensure the Autofill with sample address checkbox is ticked. Click Apply and we'll mimic a user in that country typing the address into our form so you can view their experience.
Alternatively, book a demo with one of our Product Experts here:


